
Disclosure: This post contains affiliate links. Meaning if you click on a link and make a purchase, I'll earn a small commission at no extra cost to you.
Back when I used to box. Exercises like the plank and other forms of plank progression rarely played a part in my workout.
Even though I knew then the benefits of the exercise, the idea of holding the same position for as long as possible didn’t appeal to me at all.
Now, there are lots of people out there who will swear that doing set after set of three, four, or even five-minute planks is the key to building a strong core.
I tend to disagree, and here’s why…
Because if you can hold a plank for more than a minute with ease, then I doubt you’ll be gaining much more in terms of core strength and stability for every extra second that passes.
Think about it, how long have we known that progressive overload and heavy training is the best way to building strength and power.
But for some reason, the message hasn’t really hit home with the plank.
It’s like grabbing a set of 2-pounds dumbbells, curling them for 300 reps, and hoping your biceps will get bigger.
Now, I’m not saying the plank is useless.
All I’m saying is that if you want to continue to progress, then you need to approach the plank in a way that’s going to make it more challenging.
There are two ways you can do this…
Firstly, you could continue to do what most other people suggest and stick to long boring plank workouts that give you little to nothing in terms of results.
If this sounds like fun then all I can say is good luck.
Or…
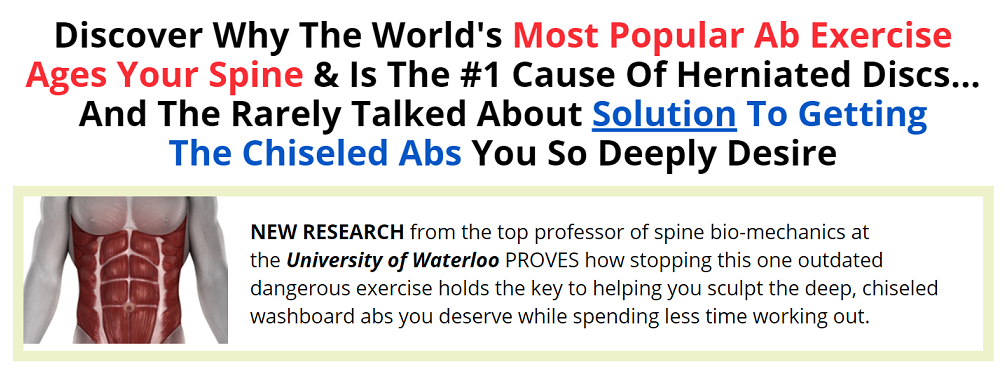
…You could bite the bullet and invest in a reputable ab program that literally takes you by the hand and shows you step-by-step, how to quickly get strong, chiseled abs without performing a single crunch.
Like the Crunchless Core Program below…
Anyway…
So in today’s blog post, I’m going to show you exactly how to structure an effective plank workout so that it kicks your ass in ways you could never imagine.
Table of Contents
Plank Variations
So just to give you a quick overview. These are some of the more common plank variations that are being used by fitness junkies all over the world.
Again there’s nothing wrong with these variations. But if you do them like I’m going to show you a little further down the page, then you’re going to benefit a hell of a lot more.
Regular Plank Variations
So as you probably know, a regular plank involves setting yourself up parallel to the floor with your back straight and your elbows resting on the floor.

There are a few adaptions to this classic exercise, including the…
- One arm plank
- One leg plank
- Plank twists
These are all great for adding a little extra variety in your program but in reality, they’re not going to do a great deal more for your core unless you perform them like I’m going to show you a little further down the page.
Side Plank Variations
This side plank has a bit of a different approach because now, you’re only supporting yourself with one arm instead of two.
This modification of the plank targets your obliques more and can be a great addition to your workout…
…IF you keep it challenging.

And like the regular plank, the side plank has a few variations as well.
This includes…
…One leg side plank
…Alternating side plank
…Hip Raises
Again, these plank variations are all minor adaptions that provide little extra benefit if you can hold them for a great deal of time.
Anything past the 60-second mark with 2 or more of these exercises. And it’s time to up your game and start looking at the plank differently.
How To Make The Plank Harder
So when it comes to making the plank harder, there are two particular things you need to do to further increase the demand on your core and supporting muscles.
Firstly, you need to position your arms further in front of you.
This is called an extended plank…

To perform an extended plank, all you have to do is increase the distance between your feet and you’re elbows.
What this does is alters the leverage on the body. This then creates a higher demand from your core stabilizer muscles which forces them to work harder.
It’s the exact same principle that’s used to progress with dozens of other calisthenics exercises.
If you do your homework, you can use this knowledge to make practically any calisthenics exercise harder.
Anyway…
Ideally, you want to position yourself to hold the plank for no more than 30-60 seconds. Any more and you’ll start to lose the additional benefit associated with the exercise.
Learn To Engage Your Core
The next thing you can do to make the plank harder is to simultaneously draw your elbows and feet closer together until you feel your abs tighten.

This is the right way to actively engage your core.
Now the position of your body won’t actually move. But by attempting to bring your elbows and feet together, your entire midsection is forced to engage.
And with the added stress of positioning your elbows further out in front of you. It creates a situation that makes your core feel like it’s literally on fire.
Don’t say I didn’t warn you.
The TRX Plank
If you don’t know what a TRX plank is, it’s basically any variation of a plank performed on a TRX suspension trainer.
The reason this works so well is that it forces your core to engage. This is because your feet (or arms depending on how you perform them) are suspended from the floor.
I won’t go into detail on all the TRX plank variations. But pretty much any regular or side plank variation can be adapted to suit this style of training and take your plank progression to new heights.
Weighted Plank
This one’s pretty self-explanatory, but adding weight to the plank is a sure-fire way to increase the exercise’s difficulty.
And the great thing is, you can combine adding a weighted vest with all the previous progression to really kick things into overdrive.
I wouldn’t recommend getting one that too heavy, as you as it’ll probably have a damaging effect on your form.
Instead, I’d just go with something lightweight like the Aduro Weighted Vest. This will still allow you to perform a wide range of plank progression without too sacrificing your form.
Plank Finishers
Now, this isn’t really a progression, it’s more of an idea you can use to make the plank harder without really doing anything differently.
If you’ve read some of my other blog posts, you’ll know that I’m a big fan of things like supersets and dropsets.
This is because I’m always looking for new ways to get the most out of my workouts in the least time possible.
And the plank is no different.
So what I like to do on occasion is add one or more of the above plank progressions to the end of my workout.
One of my favorite things to do is start off with an L-sit workout I picked up over at Thenx.
I’ll start by holding an L-sit on parallel bars, and then regress the exercise as I get tired.
Like this…
- L-Sit
- Alternating Legs L-Sit
- L-sit Tuck
- Leg Raises
- Knee Raises
Then what I’ll do is grab my ab wheel (great core exercises if you’ve never tried it). And do between 8-12 ab wheel rollouts before finally finishing up by holding a plank for as long as humanly possible.
I won’t lie, the last little plank exercise usually leaves me in a crumpled heap on the floor after around 15-20 seconds.
But it’s a great example of what you can get out of your workout if you’re willing to think outside the box.
What Muscles Do These Plank Progressions Work?
Now, the muscles worked when doing these progressions don’t actually change. Because all you’re really doing is just forcing an increased load on the same muscles.
It’s just the same as adding more weight on the barbell and squatting for 10 reps. The increased load is going to require more muscle fiber recruitment and ultimately force them to adapt.
This is the difference between stalling and progress when it comes to improving your fitness levels. Because if you’re not challenging yourself, then your body has no reason to change.
Plank Progression Workouts For Chiseled Abs
Now before I wrap things up, I just want to leave you with a few of my favorite all involve the plank in some way.
The first workout is something I like to call the plank drop.
The Plank Drop

Basically, I’ll hold an extended plank (remembering to draw my elbows and feet together) until I physically can’t hold it anymore.
Once I’m spent, I’ll drop to my knees for a quick 10-second breather and then do another set. Only now, I’ll bring my elbows and feet slightly closer together to decrease the load on my core.
I’ll then hold the position again until absolute failure, grab another quick 10-second rest and then do another set.
Again bringing my elbows and feet a little closer together.
I keep doing this until I’m holding a regular plank. And then finally finish up by holding a plank from my knees.
This is another great example of the perfect ab finisher. And usually takes less than 10 minutes to complete, provided you’re engaging your core correctly.
If you want, you could even do the exact same finisher while wearing a weighted vest or on a TRX trainer if you really want a challenge.
Alternating Hip Raises

This is a killer oblique exercise that you can add to your existing routine if you’re up for it.
It’s pretty simple.
All you’re going to do is hold a side plank and perform hip raises to failure.
Once you hit failure, swap over to the other side and do the same number of reps you did on the other side.
Once you’re done, go back to the original side and perform another set of hip raises to failure again.
Then switch back and go again.
Keep doing this until you struggle to get at least 5 quality reps on each side with good form.
It’ll take some people longer than others depending on your fitness level but one thing guaranteed.
Your obliques will feel like they’ve just taken a stinging left hook from Mike Tyson.
And that’s if you’re lucky.
To get the full benefit of this workout, you should perform the exercise as slowly and controlled as possible so you can really feel your muscles working.
Wheel Of Doom

The last plank workout I’m going to share involves just two exercises.
The plank…
…And ab wheel rollouts
Obviously, you’ll need an ab wheel for this one to work, so if you don’t have one, either Buy One or use what’s available at the gym.
If all else fails, you could always substitute the ab wheel for barbell rollouts. But only as a last resort.
So here’s what I’ll do…
I start by performing around 12-15 ab rollouts, followed immediately by a 20-30 second plank.
I’ll rest for 30 seconds and repeat the whole thing for 4-6 sets, depending on how I’m feeling that day.
Simple…?
…Yes
But it’s usually the simple things that bring the best results.
Taking Your Plank Progression To The Next Level
Now just to end things on a positive note. I hope you’ve found what I’ve shared today useful in some way.
If not, feel free to send me your most cutting insult, I promise I won’t get mad.
Seriously, everything I’ve highlighted above is just the tip of the iceberg when it comes to training your body to be in peak physical condition.
And what’s more, I’d be happy to point you in the right direction of plenty more workouts just like this to keep you occupied for months or even years to come.
If this sounds interesting, then I’d highly recommend checking out Crunchless Core by Brian Klepacki
It’s an awesome guide with over 70 kick-ass exercises to help you build strong chiseled abs.
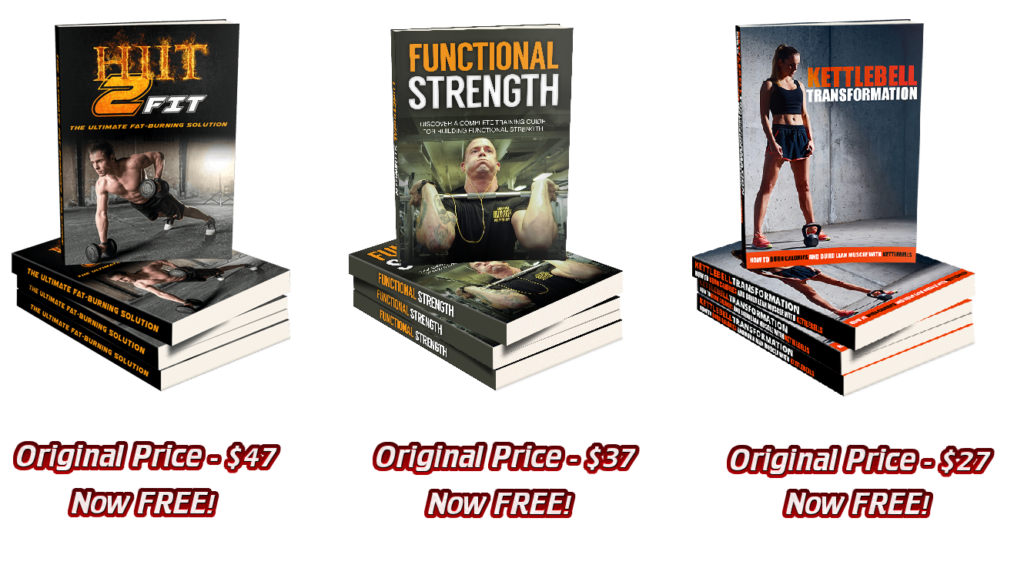
And what’s more, If you buy it using any of the links on this page, I’ll also throw in over $100 of bonus training material as a genuine thank you.
This includes…
…HIIT to Fit
…Functional Strength
…And Kettlebell Transformation
Here’s what each one looks like…
If you want them, just send me proof (screenshot or receipt) that you purchased Crunchless Core via the contact form on my website…
…Or by emailing me directly at Dan@Un-Ripped.Com
And I’ll send you everything you see above to your email address ASAP.
Believe me, it’s the closest thing you’ll get to a high five without hitching a ride to England and breaking down my front door with a battery ram.
Anyway…
If you have any thoughts about what you’ve just read or want to reach out personally and say hello. Feel free to drop a comment below…